
When it came time to add the trim, I couldn't decide what I wanted to do. I found this period image and decided to try for something similar. It is hard to see, but the gal on the right in the plaid dress is what I based my dress on. Her bodice has some delicious trim down the front of it, as well as on the sleeves. I also like WHERE the trim on the bodice goes - it makes a pretty 1860s line.

I started by cutting 2 inch wide strips of my dress fabric. I figured I would need about 3 times the circumference of my dress, which is around 160 inches (4 panel skirt), and so I cut about 500 inches, or 13 1/2 yards of 2 inch strips. I sewed them all together into one long piece. Then came the time consuming part, I turned and sewed in a 1/4" hem on each side. That seemed to take FOREVER! But it was necessary. If I made a silk dress, I wouldn't have to do that, but with cotton I had to or it would fray.
I then turned the long strip over and with a ruler and pencil, made marks on the reverse side of the strip. I made a mark at 1 inch, then 3 inches, then 4 inches, then 6 inches, then 7 inches, then 9 inches, then 10 inches, then at 12 inches using my 1 foot ruler. So, I had a mark every 1 inch then every 2 inches, over and over and over again for 500 inches! I am sure there is an easier way, but since this is the first time I made box pleated trim, it is all my poor little brain could figure out.

Then I started sewing. I lined up the marks that were 2 inches apart, and sewed across the strip. This left little 1 inch tags poking out. Because there is no way to make it all fit under my machine, I sewed every other seam, which is what the picture above shows. Then I ran the strip through again and sewed the ones I missed. The trim above is still connected with the little piece of thread from chain piecing.

When I was finished sewing at all the marks I had made on the reverse of the trim, this is what I ended up with. 1 inch tags poking out of a long strip of trim.

I pinned the trim to the bottom of my skirt.

Then I sewed it on. To make the box pleats, you have to push down every 1 inch tag poking up, right in the center. To get real box pleats, you need to make sure each tag is pushed down and centered on the seam you made underneath it, when you made the tags. See the bottom picture to get my drift. Also, see the little red spot on my thumbnail? Yeah, the framing hammer somehow whacked it while finishing the chicken coop. I suppose I am glad I didn't swing harder!

I just did a nice straight stitch, in the center of the trim, all the way around my skirt.

This is what I ended up with. It looks very much like the trim on the original image from the civil war time period, but I am still not sure it is the same. I would LOVE to know how they made their box pleated trim 150 years ago! If anyone knows, please share it with me!

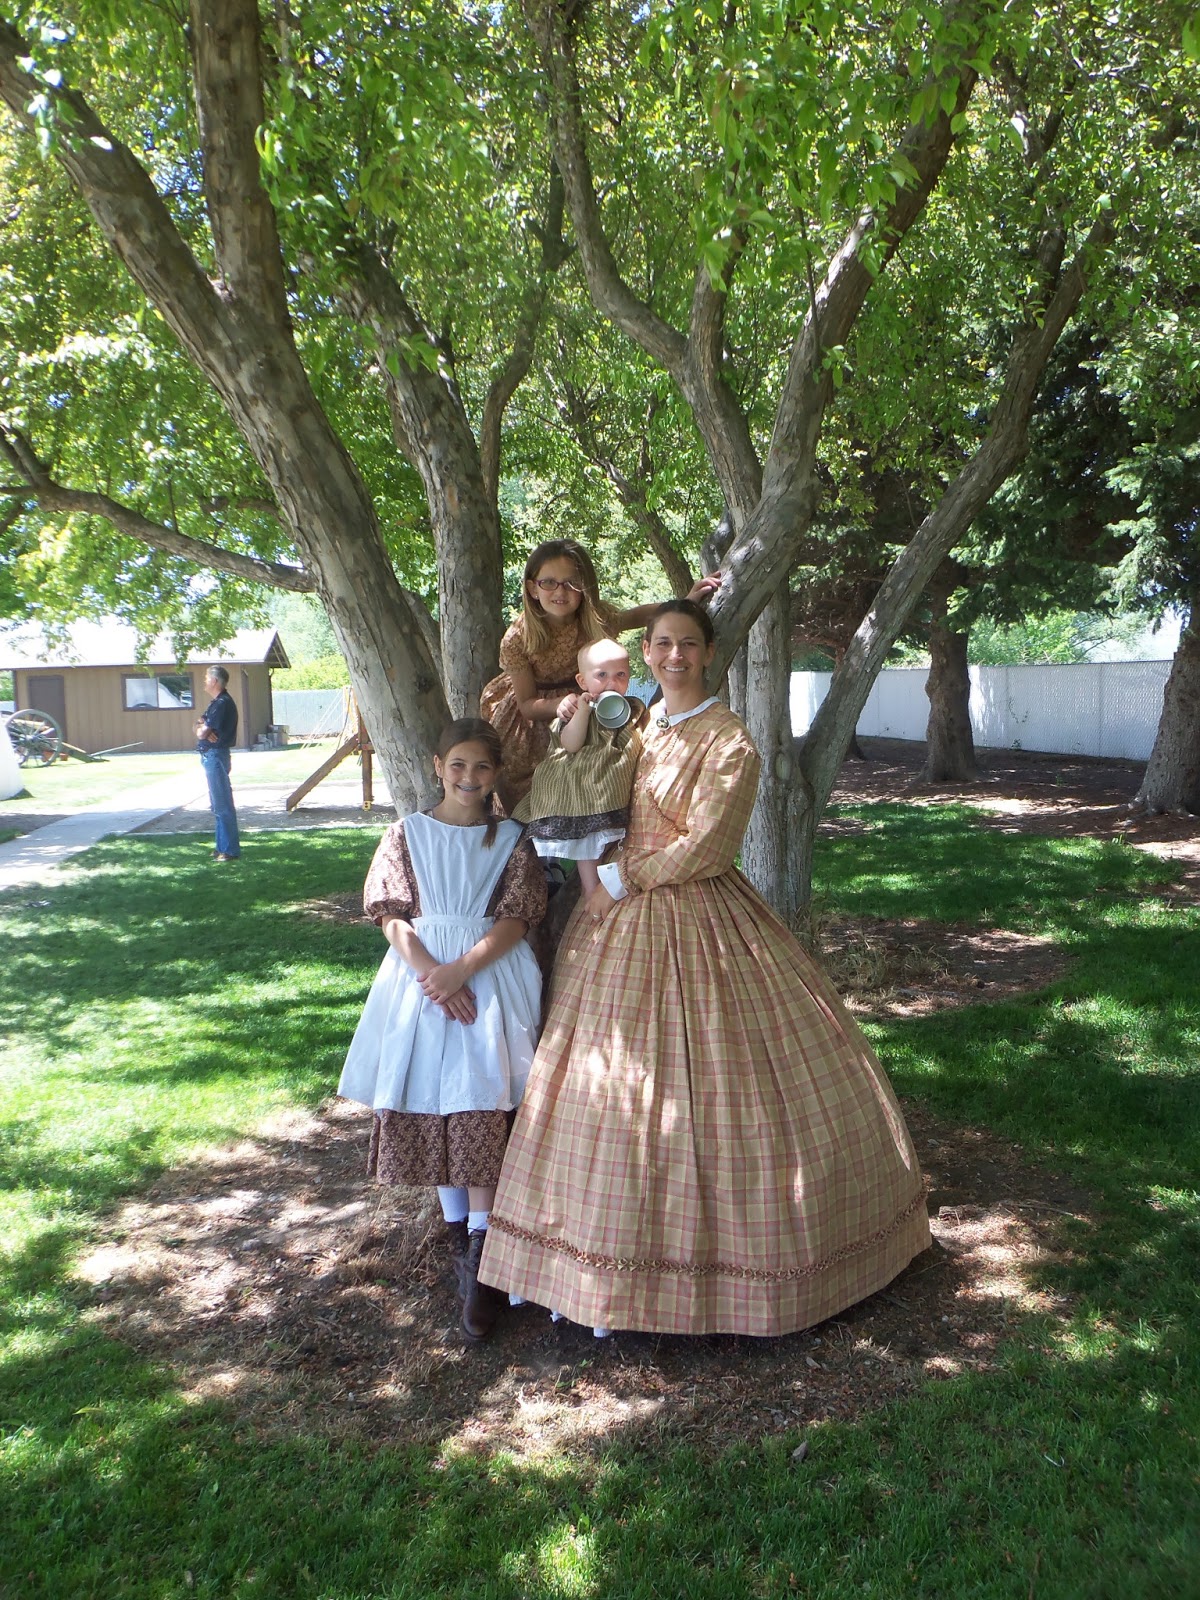
I got to wear my new dress to an event for Memorial Day at Camp Floyd. I do love how it turned out, even if the bodice trim is not my first choice - it is on and it looks nice. I love the trim on the skirt and how the overall dress turned out. Although I do need to fix a low lying petticoat!


3 comments:
I want to see a close up of the bodice trim!
Wow, you are good, AND patient. I cannot imagine doing that. You amaze me.
Mom
Very nice! Love the skirt trim. I bought fabric to make a CW dress, but haven't made it yet. I kind of doubt that I will have enough fabric to put that trim on mine, but would love to. The bolt ran out when I purchased the fabric and I might have to squeeze to get the whole dress cut out. I'm not in a CW group, but am thinking about it. If I don't join, I might just wear it when my guild demonstrates quilting at a "Days of Yore" event. Do you wear a hoop skirt? I guess I will need that or some kind of slip.
Post a Comment